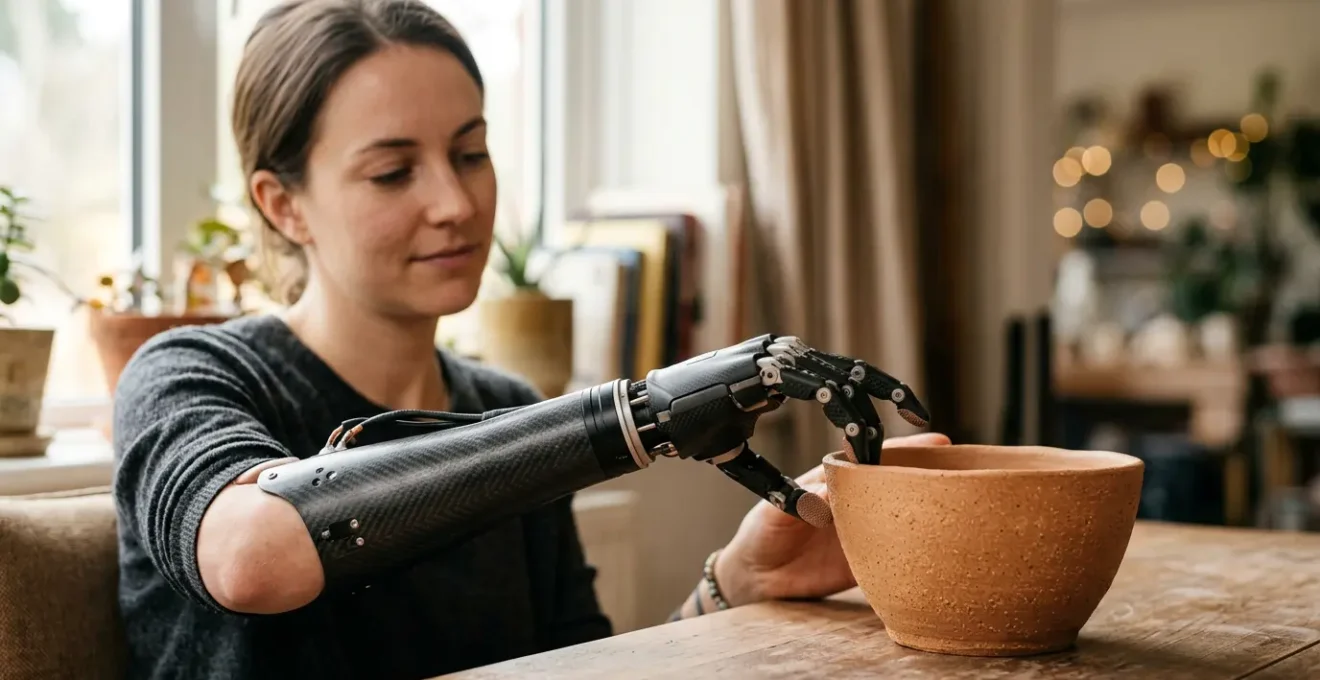
Modern prosthetics aren’t just tools; they are becoming true extensions of the self, but this integration is a journey for your brain, not just a hardware upgrade.
- The process involves a critical 3-6 month neural adaptation period where your brain rewires itself to « feel » the new limb.
- The device’s perceived weight is influenced more by psychological embodiment and sensory feedback than its actual physical mass.
Recommendation: Focus on consistent, guided rehabilitation and understanding the full spectrum of costs to ensure long-term success and prevent device abandonment.
Facing life after an amputation, whether for yourself or a child, is a journey filled with questions. The world of prosthetics can seem like science fiction, a dazzling display of bionic hands and futuristic limbs. It’s easy to get lost in the technology, believing that the moment a new device is fitted, life simply clicks back into place. The common narrative focuses on the incredible engineering, the motors, and the materials. But this is only half the story.
The real magic isn’t in the carbon fiber or the microprocessors alone. It’s in the profound dialogue that begins between your brain, your body, and this new extension of yourself. Many believe the goal is to find the most advanced device, but often overlook the crucial, personal process of adaptation. This process, known as neuroplasticity, is where the true connection is forged. It’s a path that takes time, patience, and a deep understanding of what’s happening both physically and psychologically.
This article will not just show you the technology; it will guide you through the journey of embodiment. We will move beyond the common platitudes to explore the real timeline for adaptation, demystify how your own muscles will control the device, and confront the psychological hurdles like the surprising feeling of weight. Our angle is to shift the focus from the device to you, the user. Because the ultimate success of a prosthesis lies not in its specifications, but in how well it becomes a part of who you are. We will explore the critical role of rehabilitation, the financial realities you need to prepare for, and how to confidently reclaim an active life.
To help you navigate this complex but rewarding journey, this guide breaks down the essential aspects of adapting to an advanced prosthetic. The following sections will provide clear, realistic insights into each stage of the process.
Summary: Your Guide to Prosthetic Embodiment
- Why It Takes 3-6 Months to « Feel » Your New Prosthetic Arm?
- How Do Bionic Arms Read Your Muscle Signals?
- Carbon Fiber vs Titanium Prosthetics: Which Is Lighter?
- The Expectation Mismatch That Happens When a Prosthetic Feels Heavier Than Expected
- How to Confidently Return to Sports with a Visible Prosthetic?
- How to Set Up a Home Rehab Gym for Under £100?
- The « Out-of-Pocket » Costs That Private Insurance Doesn’t Cover
- Recovering from a Stroke: What NHS Physiotherapy Actually Covers?
Why It Takes 3-6 Months to « Feel » Your New Prosthetic Arm?
The first and most important expectation to set is that integrating a prosthesis is a marathon, not a sprint. While the technology is advanced, your brain is the true supercomputer doing the heavy lifting. This process is called neuroplasticity—the brain’s remarkable ability to reorganize itself by forming new neural connections. When you lose a limb, the part of your brain once dedicated to controlling it doesn’t just go dark; it becomes ready for a new assignment.
Learning to use a prosthetic arm is akin to learning a new language for your brain. Initially, movements will feel clumsy and require intense concentration. This isn’t a failure of the device, but a necessary phase of the neural dialogue. As you practice, your brain starts to build new pathways, translating muscle signals into prosthetic actions more efficiently. Research confirms that this isn’t an overnight process; it requires a 3-6 months practice-based learning period for the brain to truly adapt and for movements to start feeling intuitive. This period is when you move from consciously thinking « I need to flex this muscle to close the hand » to simply reaching for a cup and having it happen naturally.
Significant technological advancements in prosthetics have yet to provide a device that can fully and immediately provide sensory establishment and motor control improvement without a practice-based learning/adaptation period.
– Journal of NeuroEngineering and Rehabilitation research team, Neurorehabilitation in upper limb amputation: understanding how neurophysiological changes can affect functional rehabilitation
This timeline can be frustrating, especially when you want to get back to your life. But understanding that you are actively rewiring your brain can transform this frustration into a sense of purpose. Every exercise, every small success, is a step towards true embodiment.
How Do Bionic Arms Read Your Muscle Signals?
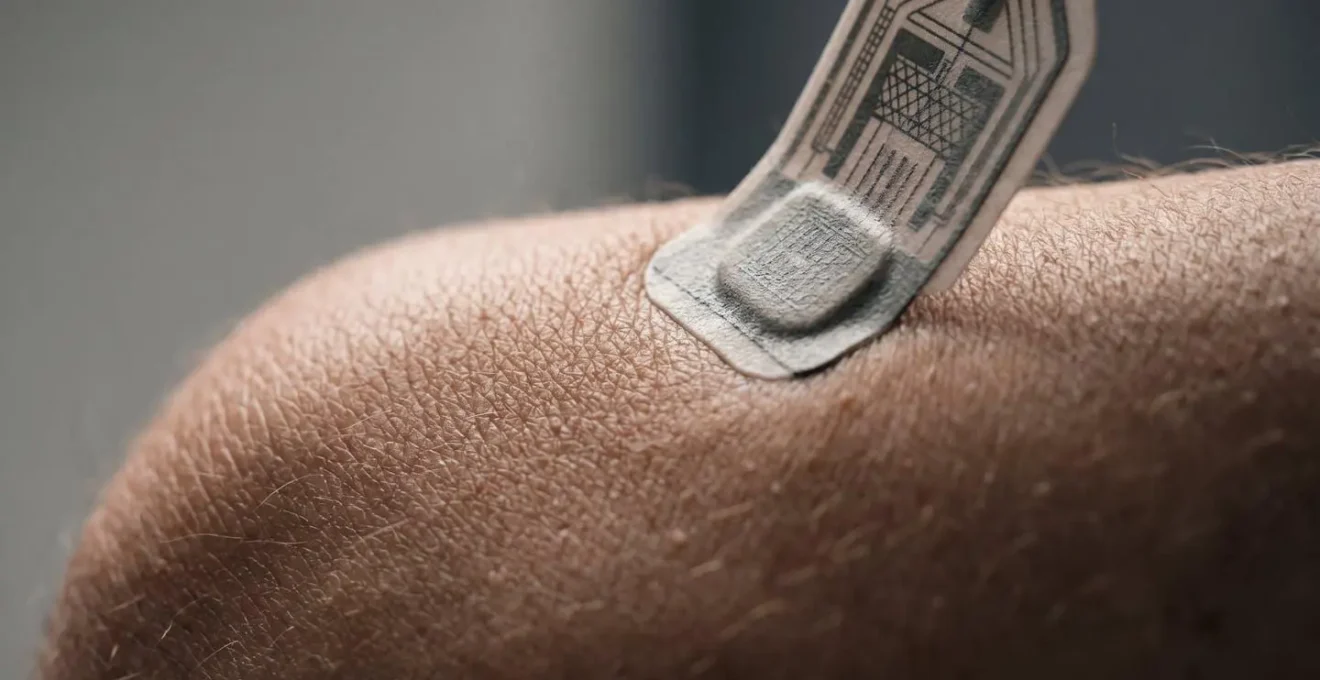
This is where technology and biology meet in a fascinating way. Advanced « bionic » or myoelectric prostheses work by listening to the electrical signals your own muscles generate. When you think about moving your wrist or closing your hand, your brain sends signals down your nerves to the muscles in your residual limb. Even without a hand to move, these muscles still contract and produce a tiny electrical voltage.
Electrodes placed inside the prosthetic socket, in direct contact with your skin, act like tiny microphones. They detect these muscle signals, amplify them, and send them to a microprocessor within the prosthesis. This processor acts as a translator, converting the specific patterns of your muscle signals into commands for the motors in the hand, wrist, or elbow. It’s a direct, intuitive line of communication from your intention to the device’s action. The image below shows the intimate interface where a sensor meets the skin to read these crucial signals.
For some, a surgical procedure called Targeted Muscle Reinnervation (TMR) can make this control even more intuitive. During TMR, surgeons re-route the nerves that once controlled the amputated hand to different muscles in the residual limb or chest. When you think « close hand, » a small piece of your chest muscle might contract instead. This creates more distinct, powerful signals for the prosthesis to read, allowing for more complex and natural control. The effectiveness of this approach is significant, with clinical data showing that 88% of TMR recipients were able to successfully operate an advanced prosthesis.
Carbon Fiber vs Titanium Prosthetics: Which Is Lighter?
The materials used in your prosthesis play a massive role in its function, durability, and, crucially, its weight. The two most common high-performance materials you’ll hear about are titanium and carbon fiber. While both are known for their strength, they have very different properties when it comes to weight, which directly impacts your daily comfort and energy expenditure.
Titanium is a metal renowned for its exceptional strength-to-weight ratio and corrosion resistance. It’s incredibly durable and often used for structural components and pylons, especially in lower-limb prosthetics that need to bear the body’s full weight. It’s a reliable, robust choice.
Carbon fiber, however, is in a class of its own when it comes to being lightweight. It’s not a metal but a composite material made of woven carbon filaments set in a resin. This construction creates a material that is incredibly strong and stiff, but also significantly lighter than titanium. On a direct comparison, material science data reveals carbon fiber is about 65% lighter than titanium by volume. For a prosthetic user, this isn’t just an abstract number. This weight difference translates directly into less fatigue, a more comfortable fit, and a feeling of greater agility throughout the day.
So, which is « better »? It’s not a simple answer. The choice often depends on the specific application. A load-bearing internal component might be titanium, while the socket or an energy-storing running blade will almost certainly be carbon fiber. Your prosthetist will design a device that uses a hybrid of materials, choosing the right one for each part to optimize for strength, function, and, most importantly, a manageable weight for you.
The Expectation Mismatch That Happens When a Prosthetic Feels Heavier Than Expected
Here we encounter one of the most common and confusing experiences for new prosthetic users: the paradox of perceived weight. Your prosthetist might tell you the device is made of ultra-light carbon fiber and weighs only a couple of pounds. Yet, when you wear it, it can feel surprisingly heavy, cumbersome, and alien. This is not in your imagination; it’s a well-documented phenomenon rooted in psychology and neuroscience.
The issue isn’t the physical weight; it’s the lack of embodiment. Your natural limbs provide constant sensory feedback—touch, temperature, and proprioception (the sense of where your limb is in space). This feedback loop constantly tells your brain, « This is part of me. » A standard prosthesis is silent; it provides no feedback, and your brain interprets this lack of connection as carrying a foreign object. It’s like carrying a hammer all day; even a light one feels heavy after a while because it’s a tool, not a part of you. In fact, studies have found that up to 70% of amputees feel their prostheses are overly heavy, even when they weigh significantly less than a natural limb.
Embodiment is of particular interest to the field of prosthetic design since the psychological and physiological integration of the prosthesis within the body has the potential to shape the user’s utilization and acceptance of the device.
– Frontiers in Neurorobotics research team, Measuring embodiment: A review of methods for prosthetic devices
The solution lies in closing that feedback loop. Emerging technologies are now able to provide sensory feedback, often through small vibrations or electrical signals sent to the nerves in the residual limb. This feedback can signify grip force or touch, beginning a true sensory dialogue. When the brain starts receiving these signals, the perception of the limb changes dramatically.
Case Study: The Impact of Sensory Feedback on Perceived Weight
In a study focusing on embodiment, researchers equipped an above-knee prosthesis with a system that transmitted sensory feedback through electrical signals to the user’s nerves. The results were remarkable. The participant reported a 23% reduction in the perceived weight of the leg and a 36% boost in confidence while walking. Most profoundly, their feeling of embodiment—the sense that the prosthesis was part of their body—increased by 60%. This demonstrates that psychological integration, driven by sensory feedback, is a powerful tool to overcome the physical sensation of a heavy, alien limb.
How to Confidently Return to Sports with a Visible Prosthetic?
Returning to an active lifestyle, especially sports, is a powerful goal that drives many through rehabilitation. It’s not just about physical health; it’s about reclaiming a part of your identity. Doing so with a visible prosthetic brings up two challenges: the functional requirements of the sport and the psychological aspect of being « visibly different. »
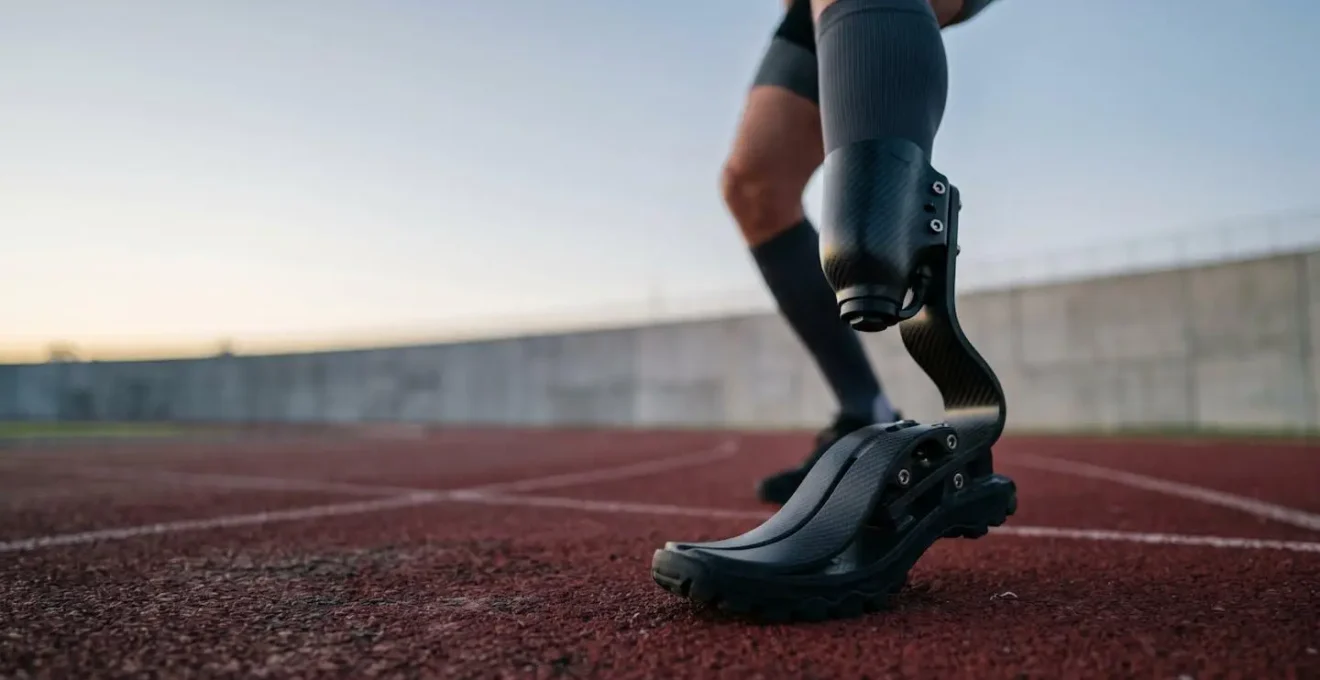
Functionally, standard day-to-day prosthetics are often not designed for the high impacts and specific movements of sports. This is where activity-specific prostheses come in. For runners, this means a carbon fiber « blade » designed to store and release energy, mimicking the function of a calf muscle and Achilles tendon. For a weightlifter, it might mean a specialized terminal device that can securely grip a barbell. These devices are not cosmetic; they are high-performance pieces of equipment. The lightweight nature of materials like carbon fiber is critical here, as it reduces the energy needed to move the limb, allowing for greater endurance and speed.
The psychological side is just as important. It’s natural to feel self-conscious at first. The key to building confidence is a two-part process: achieving competence and shifting your mindset. First, work closely with your prosthetist and a physical therapist to master the use of your sports prosthesis. The more competent and controlled you feel, the less you will worry about how you look. Confidence comes from capability.
Second, reframe the prosthetic. Instead of seeing it as a sign of loss, view it as a symbol of your resilience and a piece of advanced athletic equipment. Many adaptive athletes choose to leave their prostheses uncovered, showcasing the intricate engineering and carbon fiber weave. It becomes a conversation starter and a testament to their dedication. Joining an adaptive sports club or community can be transformative, connecting you with peers who understand the journey and can share practical tips and encouragement.
How to Set Up a Home Rehab Gym for Under £100?
Consistent rehabilitation is the engine of neuroplasticity and successful prosthetic integration. While sessions with a physiotherapist are essential, the progress you make between those appointments is what truly accelerates your adaptation. Creating a simple, effective home rehab space doesn’t require expensive machinery. It’s about having the right tools to consistently perform the exercises prescribed by your therapist.
The goal of a home gym is to focus on three core areas: strengthening the muscles in your residual limb and core, improving balance, and practicing fine motor control with the prosthesis. You can build a powerful toolkit for well under £100. Start with the basics: a set of resistance bands (both large loops and smaller ones) is the single most versatile and cost-effective item. They are perfect for strengthening the key muscles that will control the prosthesis. A foam roller is excellent for massage and releasing tight muscles in your back and supporting leg. For balance, a simple wobble cushion or foam pad can work wonders. Finally, for dexterity exercises, simple household items like clothes pegs, nuts and bolts, and different sized blocks are often what occupational therapists recommend.
Your Action Plan: Essential Home Rehab Kit for Under £100
- Resistance Bands (£20): Purchase a multi-pack with varying levels of resistance. Use them for shoulder stabilization, core exercises, and targeted strengthening of the muscles in your residual limb as guided by your physio.
- Wobble Cushion or Foam Pad (£15): Essential for improving proprioception and balance. Start by simply standing on it and progress to single-leg stands (on your sound side) or performing exercises while on the cushion to challenge your core.
- Set of Small Hand Weights (£25): A small set (e.g., 1kg, 2kg, 3kg) is useful for symmetrical strength training, ensuring your sound side doesn’t overcompensate and your whole body remains in balance.
- Mirror (£15): A full-length, shatterproof mirror is a crucial tool. It provides immediate visual feedback, helping you check your posture and ensure you are performing movements correctly and symmetrically.
- Dexterity Kit (under £25 or free): Assemble a box of items to practice grip patterns: clothes pegs, various sized nuts and bolts, a deck of cards to shuffle, different shaped blocks to stack, and modeling clay to knead.
Case Study: The Power of Home-Based Training
A study involving children with congenital limb differences demonstrated the profound impact of home rehabilitation. The participants engaged in an 8-week home intervention using custom 3D-printed prosthetics and a structured training program. The results showed significant improvements in their gross manual dexterity. Furthermore, brain scans revealed increased activity in the premotor cortex during prosthetic use, providing clear evidence that consistent, home-based training can induce beneficial cortical plasticity and functional improvements without the need for expensive clinical facilities.
The « Out-of-Pocket » Costs That Private Insurance Doesn’t Cover
While the focus is often on the exciting technology, it’s crucial to approach prosthetic rehabilitation with a clear and realistic financial plan. The initial cost of an advanced prosthesis can be substantial, and navigating insurance coverage is often a complex process. However, the sticker price of the device is rarely the full story. There are numerous « out-of-pocket » costs that are often overlooked but are essential for long-term success.
These hidden costs can include: co-pays and deductibles for the prosthesis itself, follow-up appointments with your prosthetist for adjustments, and ongoing physiotherapy and occupational therapy sessions that may not be fully covered. The prosthetic socket, the custom-made interface between your limb and the device, is the most important part of the system. As your residual limb changes shape over the first year, you will likely need one or more new sockets, and these are often a separate, significant cost.
Furthermore, maintenance and repairs are an inevitable reality. A high-tech bionic hand has complex electronics and moving parts that will require servicing. You may also need specialized items like waterproof covers to shower or swim, or multiple terminal devices for different activities (e.g., a simple hook for gardening and a myoelectric hand for social situations). These are rarely covered by a standard insurance policy. Understanding this full financial picture is not meant to be discouraging; it’s about being prepared. Poor comfort and functionality, often linked to an inability to afford necessary adjustments or replacements, are major factors in device rejection. In fact, industry research estimates that over 52% of amputees abandon their prostheses due to such concerns.
Viewing these expenses not as a burden but as an investment in your self and your functional outcome is a helpful mindset. Proactive discussions with your insurance provider, your clinical team, and amputee support charities can help you create a sustainable long-term plan.
Key Takeaways
- Prosthetic integration is a neuro-psychological process; the brain needs 3-6 months of consistent practice to « embody » the new limb.
- Perceived weight is more about sensory feedback and psychological acceptance than the physical mass of the device.
- A successful outcome depends on a triad of factors: the right technology, intensive rehabilitation, and a realistic financial plan covering hidden costs.
Recovering from a Stroke: What NHS Physiotherapy Actually Covers?
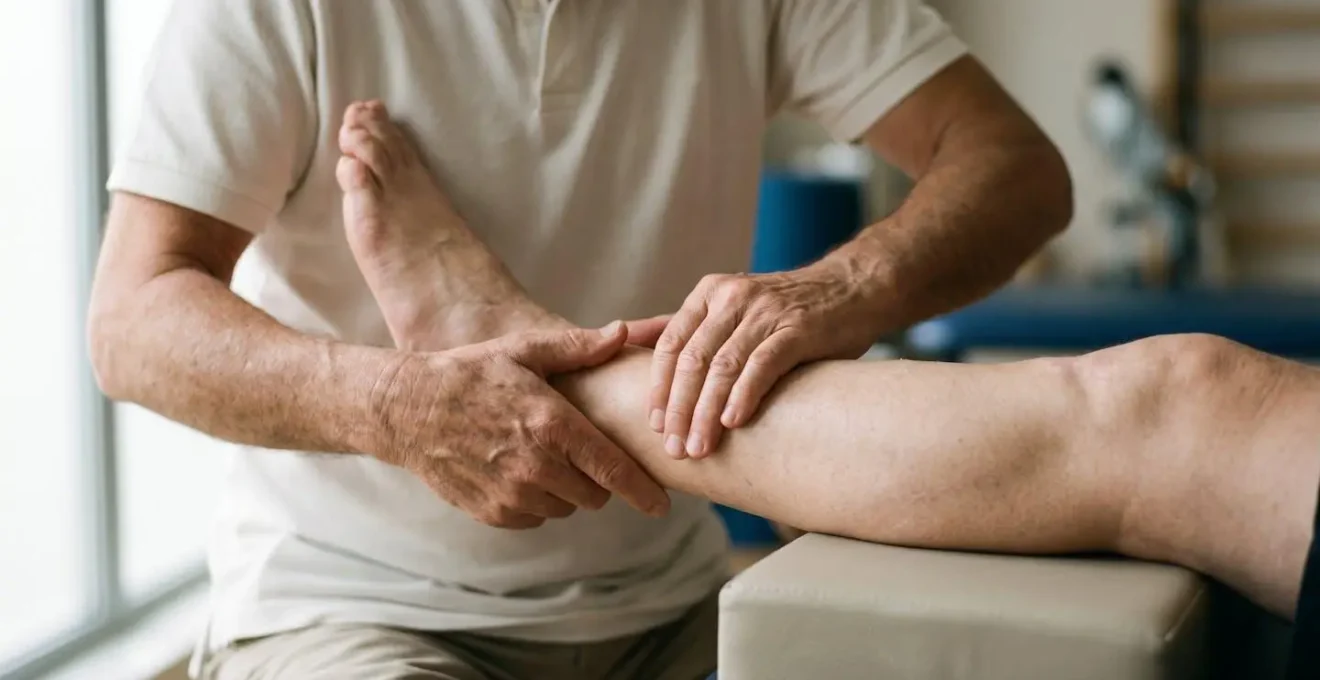
Whether your limb loss is due to trauma, illness, or a congenital difference, the principles of rehabilitation are universal, and physiotherapy is the cornerstone of your recovery. While this section title mentions stroke and the NHS, the process and coverage principles are highly relevant to any new amputee navigating a healthcare system. Your physiotherapy is not just about learning to use the prosthesis; it’s about preparing your body and brain for it.
In the initial phase, physiotherapy focuses on pre-prosthetic preparation. This includes managing post-operative pain and swelling, maintaining the range of motion in your remaining joints, and beginning a crucial strengthening program for your residual limb and core. A therapist will guide you through « limb shaping, » often using compression garments to prepare your residual limb for a comfortable socket fit. They will also work on preventing muscle contractures and improving your overall balance and conditioning. This early, intensive work is critical, as neuroimaging studies indicate that the most significant brain reorganization and adaptation occurs in the first six months following an amputation.
Once you are fitted with your first prosthesis, the focus of physiotherapy shifts. Your therapist will teach you how to put on and take off the device (donning and doffing), how to monitor your skin for pressure points, and how to gradually increase your wearing time. Then begins the functional training: relearning to walk with a stable gait, practicing balance, and for upper-limb amputees, working with an occupational therapist to learn how to control the terminal device for everyday tasks. What is « covered » by a public health system like the NHS or private insurance will typically include a set number of these sessions. The goal is to get you to a baseline level of safe, functional use. It is this foundational training that promotes the proper sensorimotor activation patterns, enabling your brain to functionally adapt to the prosthesis.
The journey doesn’t end when your covered sessions run out. This is where your home exercise program and continued personal commitment become paramount, building upon the professional foundation your therapist has provided.
Now that you have a comprehensive understanding of the journey, from the neural science to the practical costs, the next step is to begin the conversation with a qualified clinical team to create your personalized plan.